If you are new to woodworking like me and you have a door frame break, you might feel a bit intimidated or tempted to have a professional install a new frame. However, if the damage is not extensive, you can repair the door frame yourself. I asked my dad, a handyman, to help and thus show me how to fix a door frame.
[ez-toc]
Fixing a door frame is less expensive than replacing it. You need to remove the molding, the shims, and the doorstop. If you are replacing the frame, you need to remove it; if not, take a rubber mallet and gently straighten it. Hammer the frame until both sides are even. Then reinstall the frame.
I thought I had to get a contractor to replace my damaged door frame, but with the help of my dad, a handyman, we repaired the door frame and reinstalled it. I know many first-time DIYers can worry that it’s too difficult to fix on their own, so I decided to share how easy it can be to fix a door frame.
The supplies, time, and cost of fixing a door frame will depend on how damaged the door frame is. So in this post, we will look at how to fix:
-A warped door frame
-A door frame that has split
How to fix a damaged interior door
Fixing A Warped Interior Door Frame
The first repair we will look at is fixing a warped door frame. It’s by far the most difficult repair job.
Step 1
When it comes to fixing a warped door frame, you will need to remove the molding and stopper using a hammer and chisel or putty knife. Then, starting at the bottom, carefully pry the doorstop and molding away from the door frame.
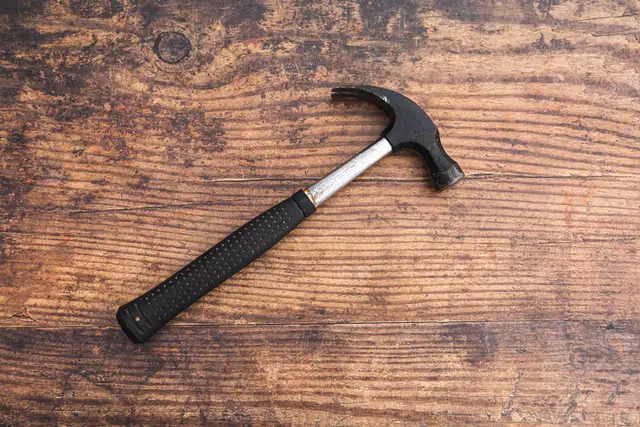
Try not to damage the stop when removing it. Instead, use the back of the claw hammer at each side of a nail to remove the nails evenly. Then, remove the remaining nails from the doorstop.
Step 2
Next, you have to remove the shims (these are the wooden or metal pieces around the door). They help correctly align the door, so it sits level in the frame. To repair the broken frame, you will need to remove them.
Step3
Grab your rubber mallet and gently hammer the door frame until it’s straightened out. Keep the door closed when you are straightening it, as this will help you keep the door even with the frame.
Step 4
To avoid damaging the door frame, place a small but thick piece of wood over the damaged area you are hammering. It helps distribute the load and straighten the door frame without damaging it.
Step 5
Remember to measure frequently to know when the frame and door are flush or the door doesn’t close properly; you might have a gap between the door and frame. Warped doors can indicate a moisture problem, so check for wood rot in the frame or door.
Step 6
You need to replace the shims you took out before straightening the door. If the shims are damaged, you can buy wooden ones for interior doors and plastic ones for exterior doors. Be sure to put shims on either side of the frame at hinge height.
Don’t tighten the shims until you are happy with the frame. Then, use a spirit level and open and close the door a few times to ensure that the door frame is straight and the door lines up correctly. Renail the places where you placed the shims.
Step 7
When you are happy with the frame, you can reinstall the molding. Remember to remove the excess shim pieces if you use new ones by using a putty knife.
Step 8
Test the door after everything is back in place and if you are satisfied, replace the doorstop. Keep in mind, some door frames may be too damaged to repair, and you might need to have them replaced.
Fixing A Cracked Interior Door Frame
The second frame repair we will look at is how to repair a crack or split in the frame.
Step 1
You need to find where the frame is split; splits or cracks happen when a door is forced open, or the door is kicked in. Once you know where the damage lies, you must remove the molding and the door strip.
You can use a hammer and chisel or putty knife and start the removal at the bottom of the door frame. Now remove the door stop and the remaining nails without damaging them.
Step 2
Using a pencil, measure and mark six inches above and below the frame damage. Mark a little above the damage if the split is near the bottom. Using a small hand or power saw, carefully cut where you marked. Put two nails (one on each end, top, and bottom) where you removed the damaged frame to keep it in place.
Step 3
Then you need to cut a piece of wood to replace the damaged part you removed from the frame. Use the same type of wood, length, and thickness so the door functions correctly. Then measure and cut the piece to the exact size as the piece you removed.
Step 4
Remember not to use pressure-treated wood as it will bend or twist. If you are unsure of the kind of wood, you can take the damaged piece to your local hardware store, and they will give you the suitable wood for the repair.
Step 5
Remove the nails you put in to keep the frame in place. Take carpenters glue and glue the back, top, and bottom of the wood piece to the frame. These glues are thin-set, so they won’t leave gaps, and are perfect for fixing a door frame. Once the glue is dry and fully set, use two nails on the top and bottom of the piece to further secure it to the frame.
Step 6
When the repair is finished, sand the piece until every part is flush with the frame. Next, you can use wood filler to cover the repaired area; it will cover any gaps and helps keeps the repair in place. When it is dry, you can sand it smooth, then cover it in a coat of primer paint. When the coat of primer is dry, you can paint the repair the same color as the rest of the door frame.
Conclusion
Repairing your door frame doesn’t have to be a huge undertaking. You can quickly fix your door frame with the right supplies and know-how. However, sometimes the frame is too damaged to fix; you might need to replace it. If you are unsure, you call an expert to assess the damage.
Resources
https://dengarden.com/home-improvement/How-to-Fix-a-Broken-Door-Frame
https://www.homeserve.com/en-us/blog/cost-guide/door-frame-repair/